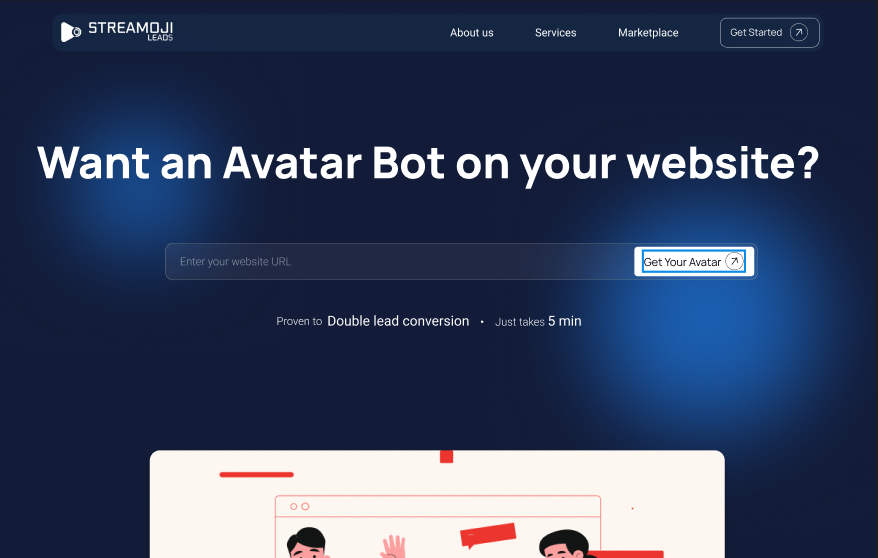
Want an AI Avatar on your website?

What is Streamoji Leads?
Just add 5 lines in your website code and see leads coming in.
Easy 3-step setup
Get your AI avatar live in three simple steps
Paste your website URL
Add your website URL and hit start. Our system automatically reads and understands your website content.
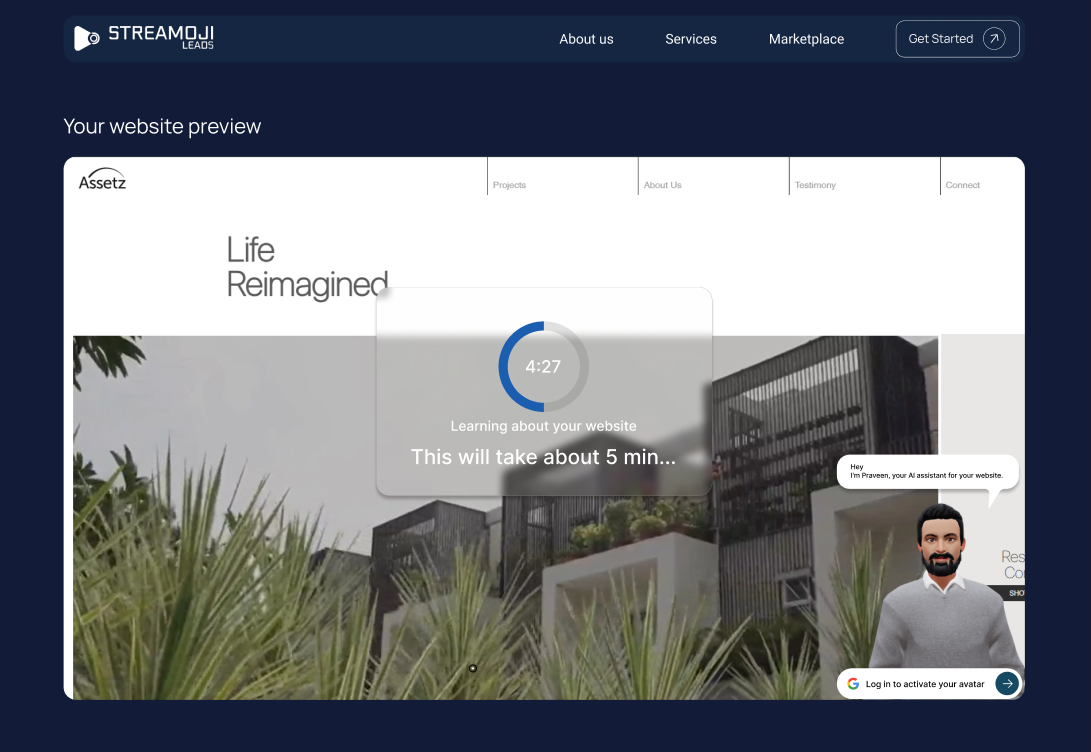
AI learns your business
In 5 minutes, the AI avatar learns your services, pages, and FAQs - no setup, no training needed.
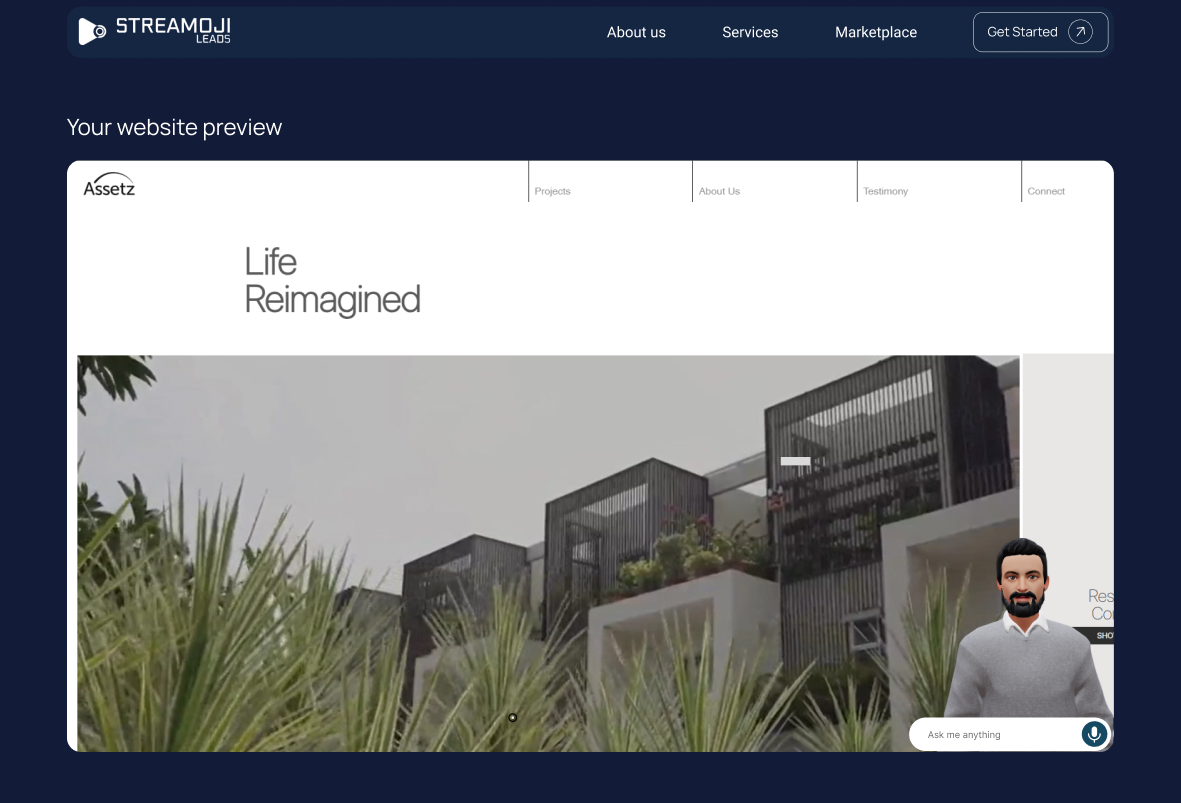
Experience your AI avatar
Preview your AI avatar in action and see how it talks to visitors and captures leads.
From Visitor to Lead - In Just Seconds

Smart Welcome
A helpful avatar pops up in the corner of the screen and invites visitors to start a conversation

Talk Naturally
With one click, the avatar begins speaking and asks the visitor what they need — complete with easy-to-read subtitles.

Personal Guidance
Based on the visitor's answers, the avatar guides them straight to the right page, product, or solution.
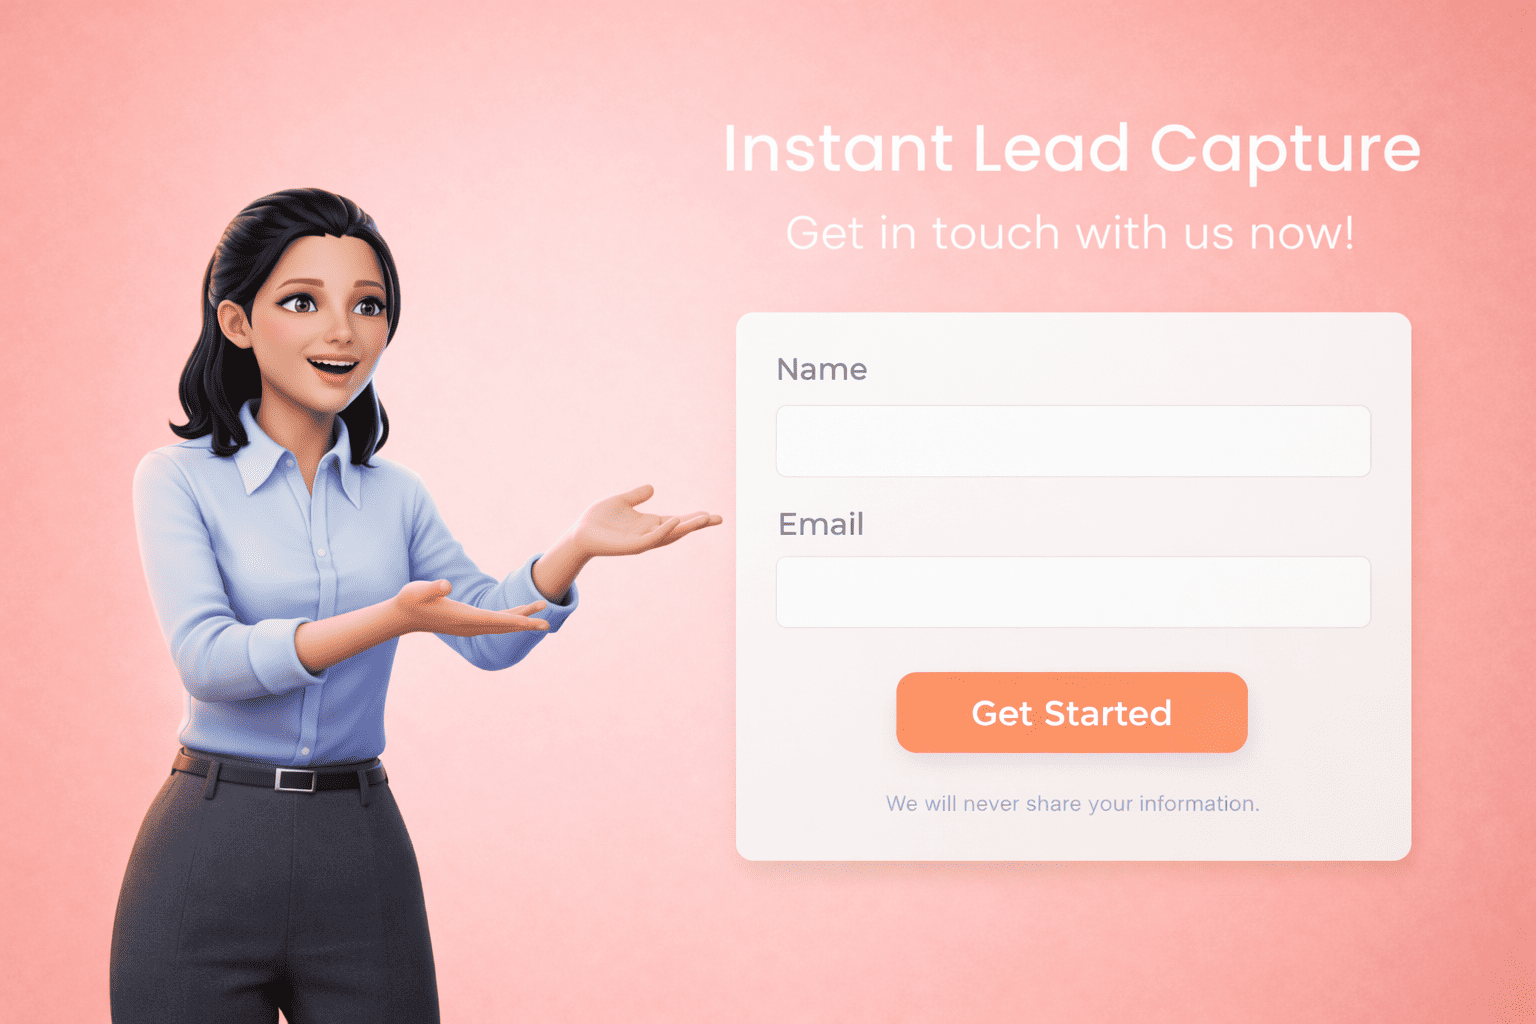
Instant Lead Capture
At the perfect moment, the avatar smoothly collects contact details like phone number or email.
Easy Integration
Ask your AI coding assistant to integrate the React widget
Goal: Integrate the Streamoji AvatarWidget (@streamoji/avatar-widget) into our React app so the chat/agent widget appears on the site. When the widget asks to open a URL (e.g. "Create avatar"), we should navigate inside our app with our existing router instead of opening a new tab.

Steps:

1. Install and env
    Install: npm install @streamoji/avatar-widget (or yarn/pnpm equivalent).
    Get your agent's unique ID from the Streamoji dashboard.

2. Create a client-only wrapper (gate)
   Create a small wrapper component that:
   - Imports the widget and its CSS:
     import { AvatarWidget } from "@streamoji/avatar-widget";
     import "@streamoji/avatar-widget/styles.css";
   - Renders <AvatarWidget /> only when the widget should be visible (e.g. hide it on the page where you embed the full avatar creator, so the widget doesn't sit on top of the creator).

//     The widget API:
//     - agentId (string, optional): Agent id from the Streamoji dashboard; omit when using avatarUrl and/or programmatic-only usage.
//     - avatarUrl (string, optional): Custom GLB URL; overrides agent-based default GLB when set.
//    - onNavigationRequested (function, optional): Called when the agent wants to open a URL.
//    - presetUserDetails (object, optional): { name?: string, email?: string, phone?: string } — if you have a logged-in user, pass this so the widget can skip lead capture and personalize the experience.

3. Wire navigation to your router
   In the wrapper, implement onNavigationRequested using your router's API:
   - Next.js (App Router): useRouter() from next/navigation and router.push(pathname + search + hash). Use usePathname() if you need to hide the widget on certain paths (e.g. pathname includes "createAvatar").
   - Next.js (Pages Router): useRouter() from next/router and router.push(...).
   - React Router v6: useNavigate() and navigate(pathname + search + hash).
   - Other routers: Use whatever API they provide for programmatic navigation (e.g. history.push).
   Parse the requested url (e.g. new URL(url, "https://dummy")) to get pathname, search, and hash, then call your router with ${pathname}${search}${hash}. If parsing fails, you can fall back to router.push(url) or navigate(url).

4. Where to mount the wrapper
   Render the wrapper once at the root of the app (e.g. in the root layout or the component that wraps all routes) so the widget is available on every page where it's not explicitly hidden. In Next.js App Router you'd put it in app/layout.tsx (inside <body>) and make the wrapper a Client Component ("use client"). In React Router you might put it in the component that wraps <Routes> or <Outlet>.

5. Hide widget on specific routes (optional)
   If you have a route that hosts the full avatar creator (e.g. /createAvatar), use your router's current path (e.g. usePathname() in Next.js or useLocation().pathname in React Router) and return null instead of <AvatarWidget /> when the path includes that segment, so the widget doesn't show on top of the creator.

6. Optional: logged-in user
   If your app has auth, in the wrapper subscribe to the auth state and pass presetUserDetails={{ name: user.displayName, email: user.email }} (or whatever your user object provides) to <AvatarWidget /> when the user is logged in.

Reference (our stack): We use Next.js App Router. We have a gate component that uses usePathname() and useRouter() from next/navigation, returns null when pathname includes "createAvatar", and otherwise renders <AvatarWidget agentId={...} presetUserDetails={...} onNavigationRequested={(url) => { /* parse url, then router.push(pathname + search + hash) */ }} />. The gate is rendered in the root layout.tsx so the widget appears site-wide except on the creator page.
Managing Leads Just Got Easier
Streamoji Leads combines powerful functionality with an easy-to-use experience. Every feature is crafted to streamline your workflow, reduce manual work, and help you get more value from every lead.
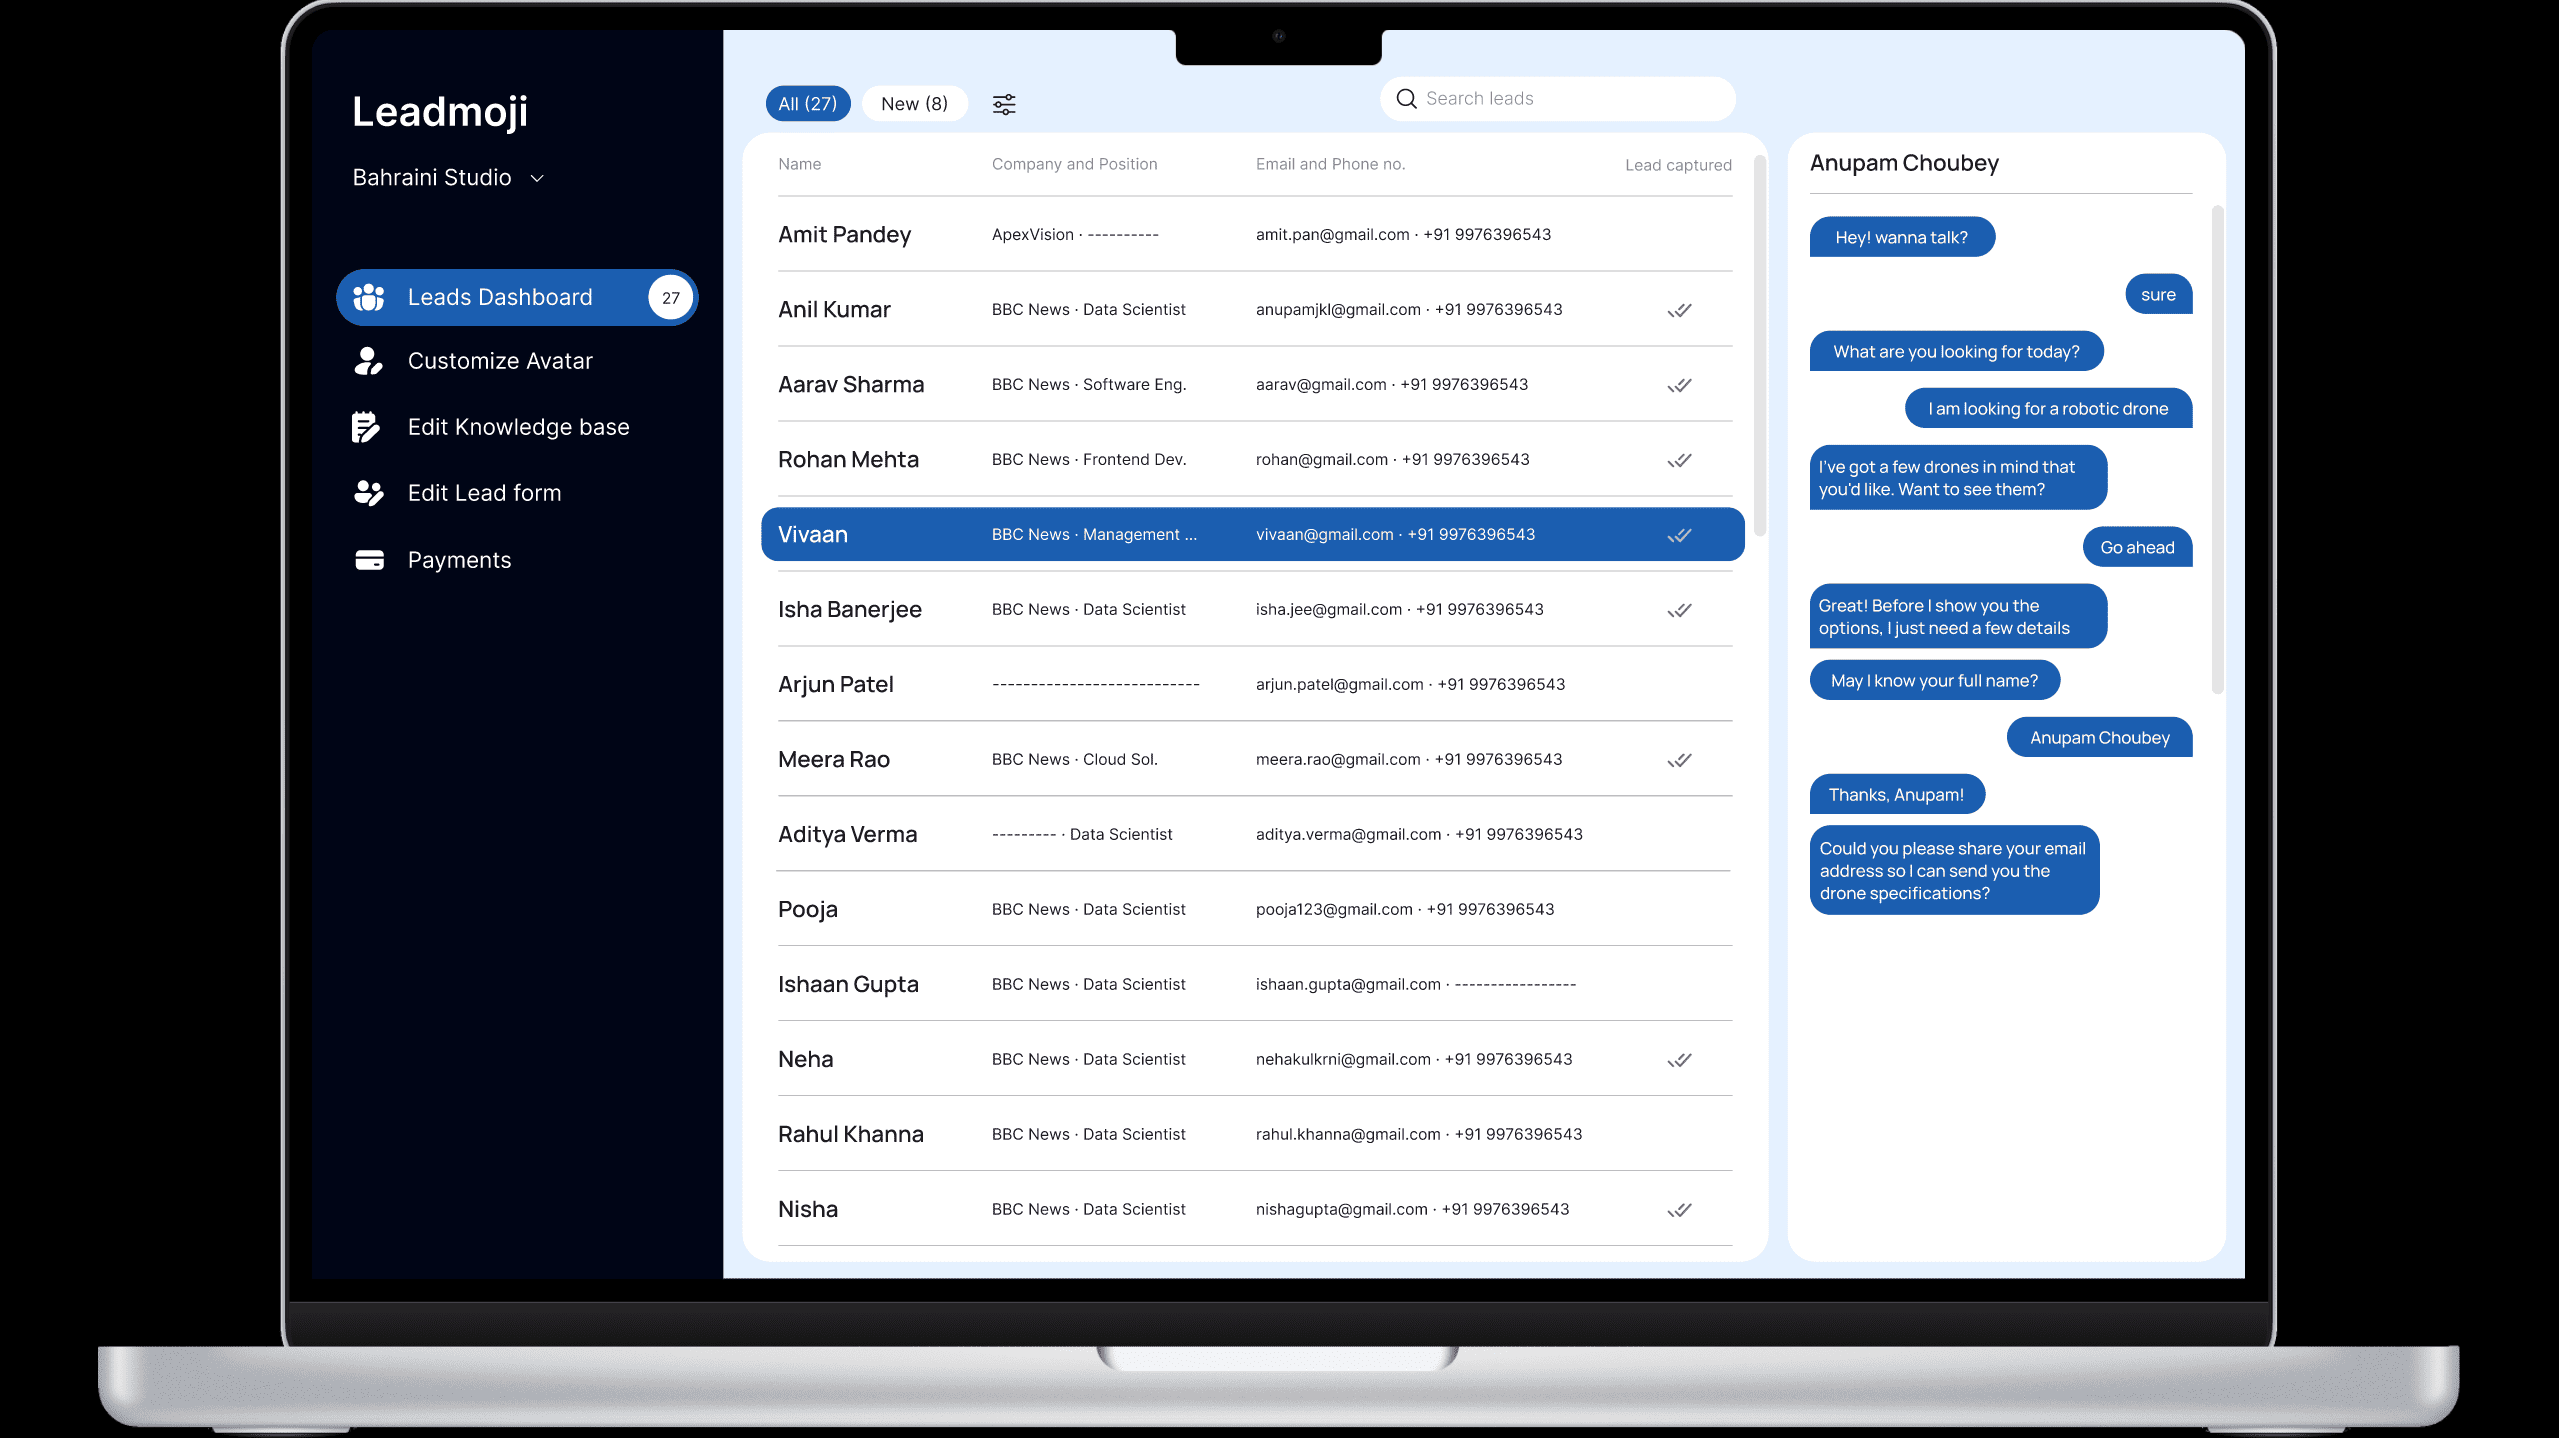
Centralized Lead Dashboard
Manage all your leads effectively with a single, smart dashboard designed for clarity and speed.
Why teams love it:
- •View all captured leads in one organized list
- •See key details instantly:
- • Company Name
- • Phone Number
- •Open and review full conversation in one click
- •No scattered data — everything stays in one place
Full Conversation View
Know Exactly What Your Customer Said
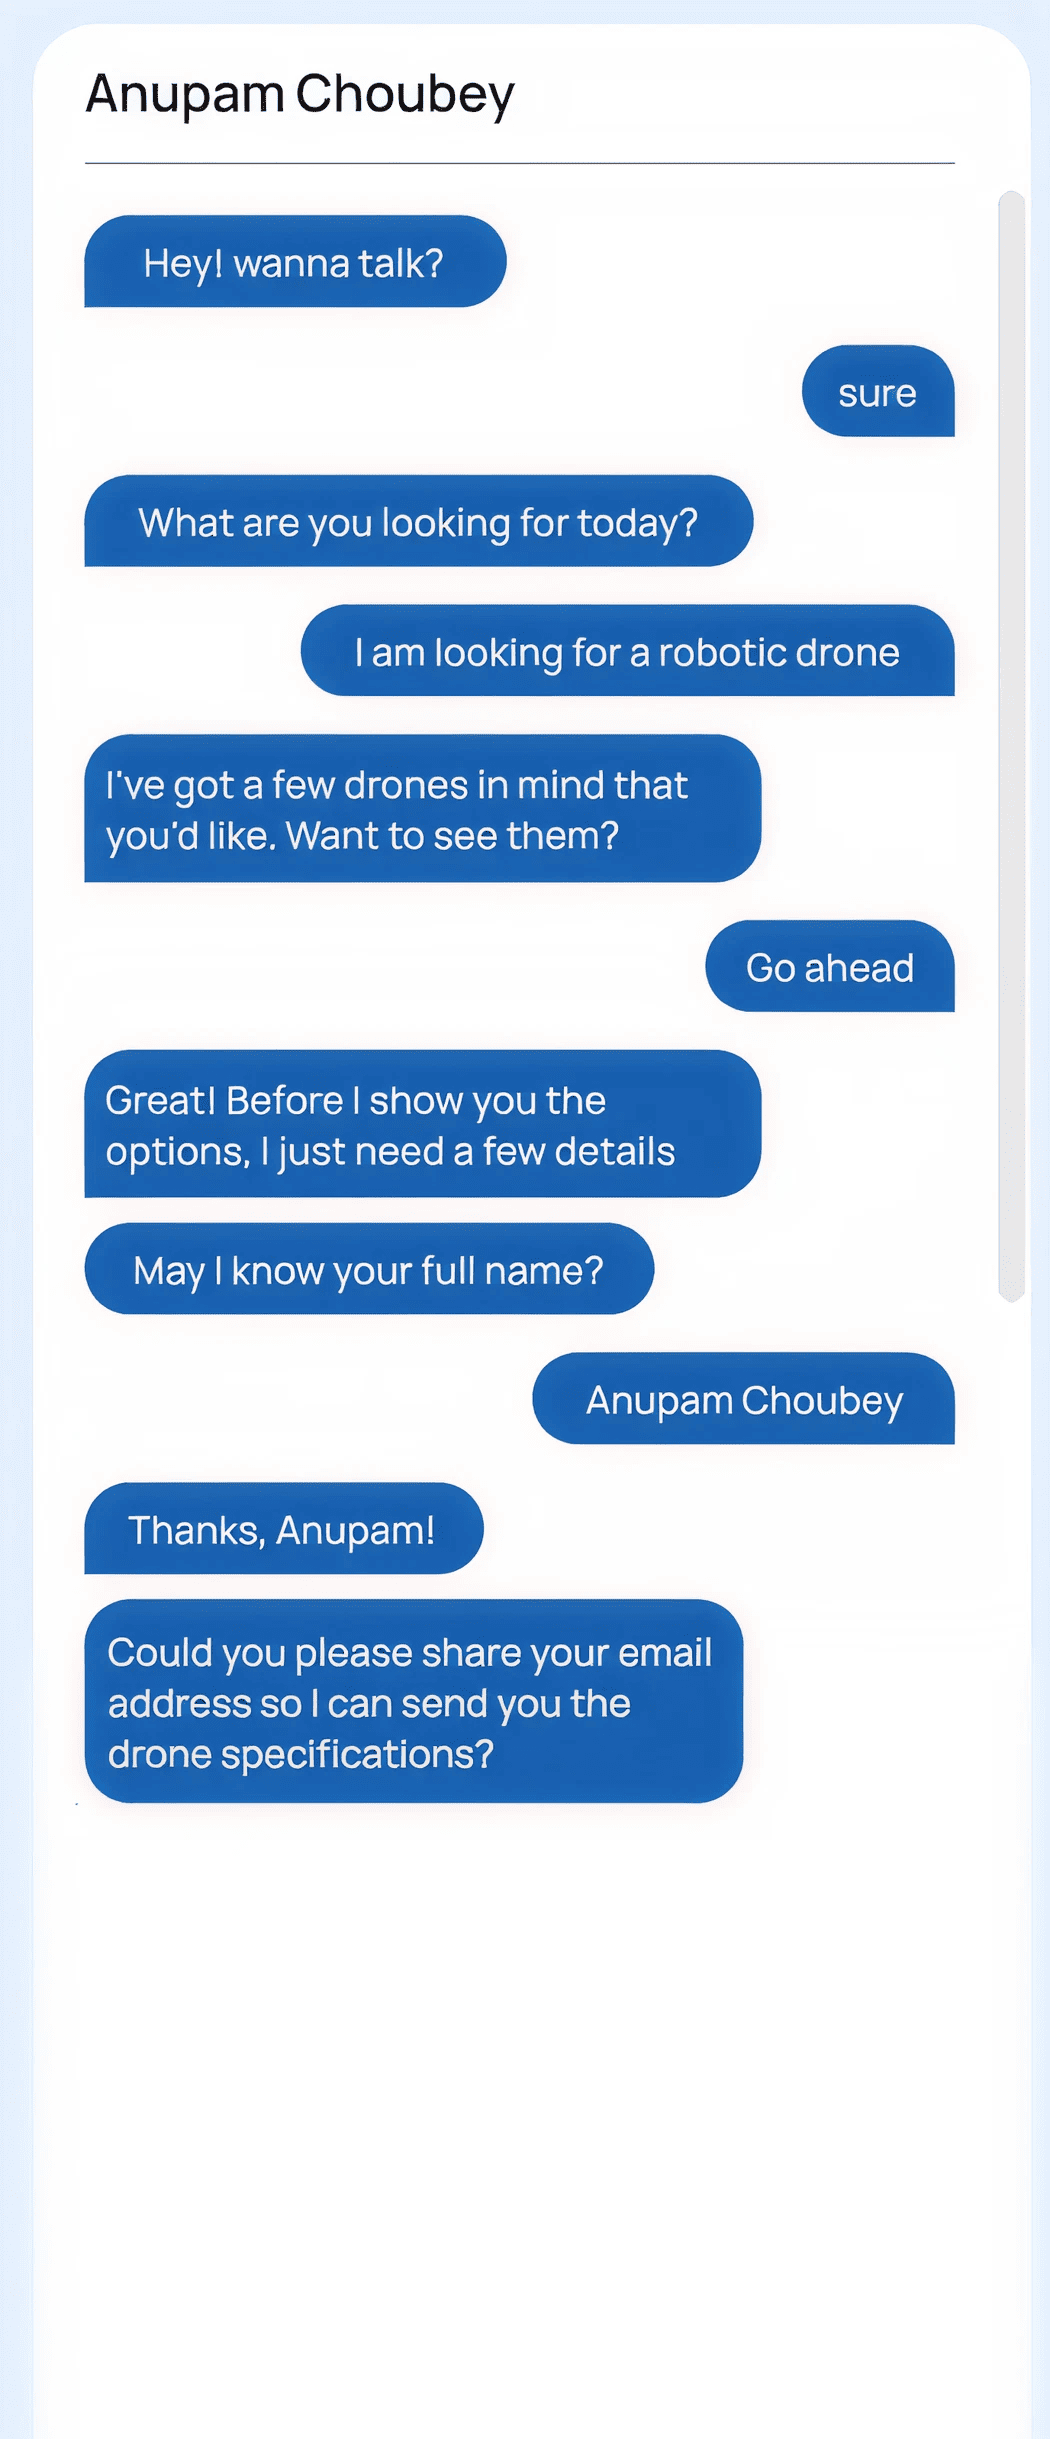
Click on any lead and instantly see the complete chat history on the right side of your dashboard.
You can:
- •Read full visitor conversation
- •Understand their exact requirements
- •See what AI asked and what user replied
- •Get full context before contacting them
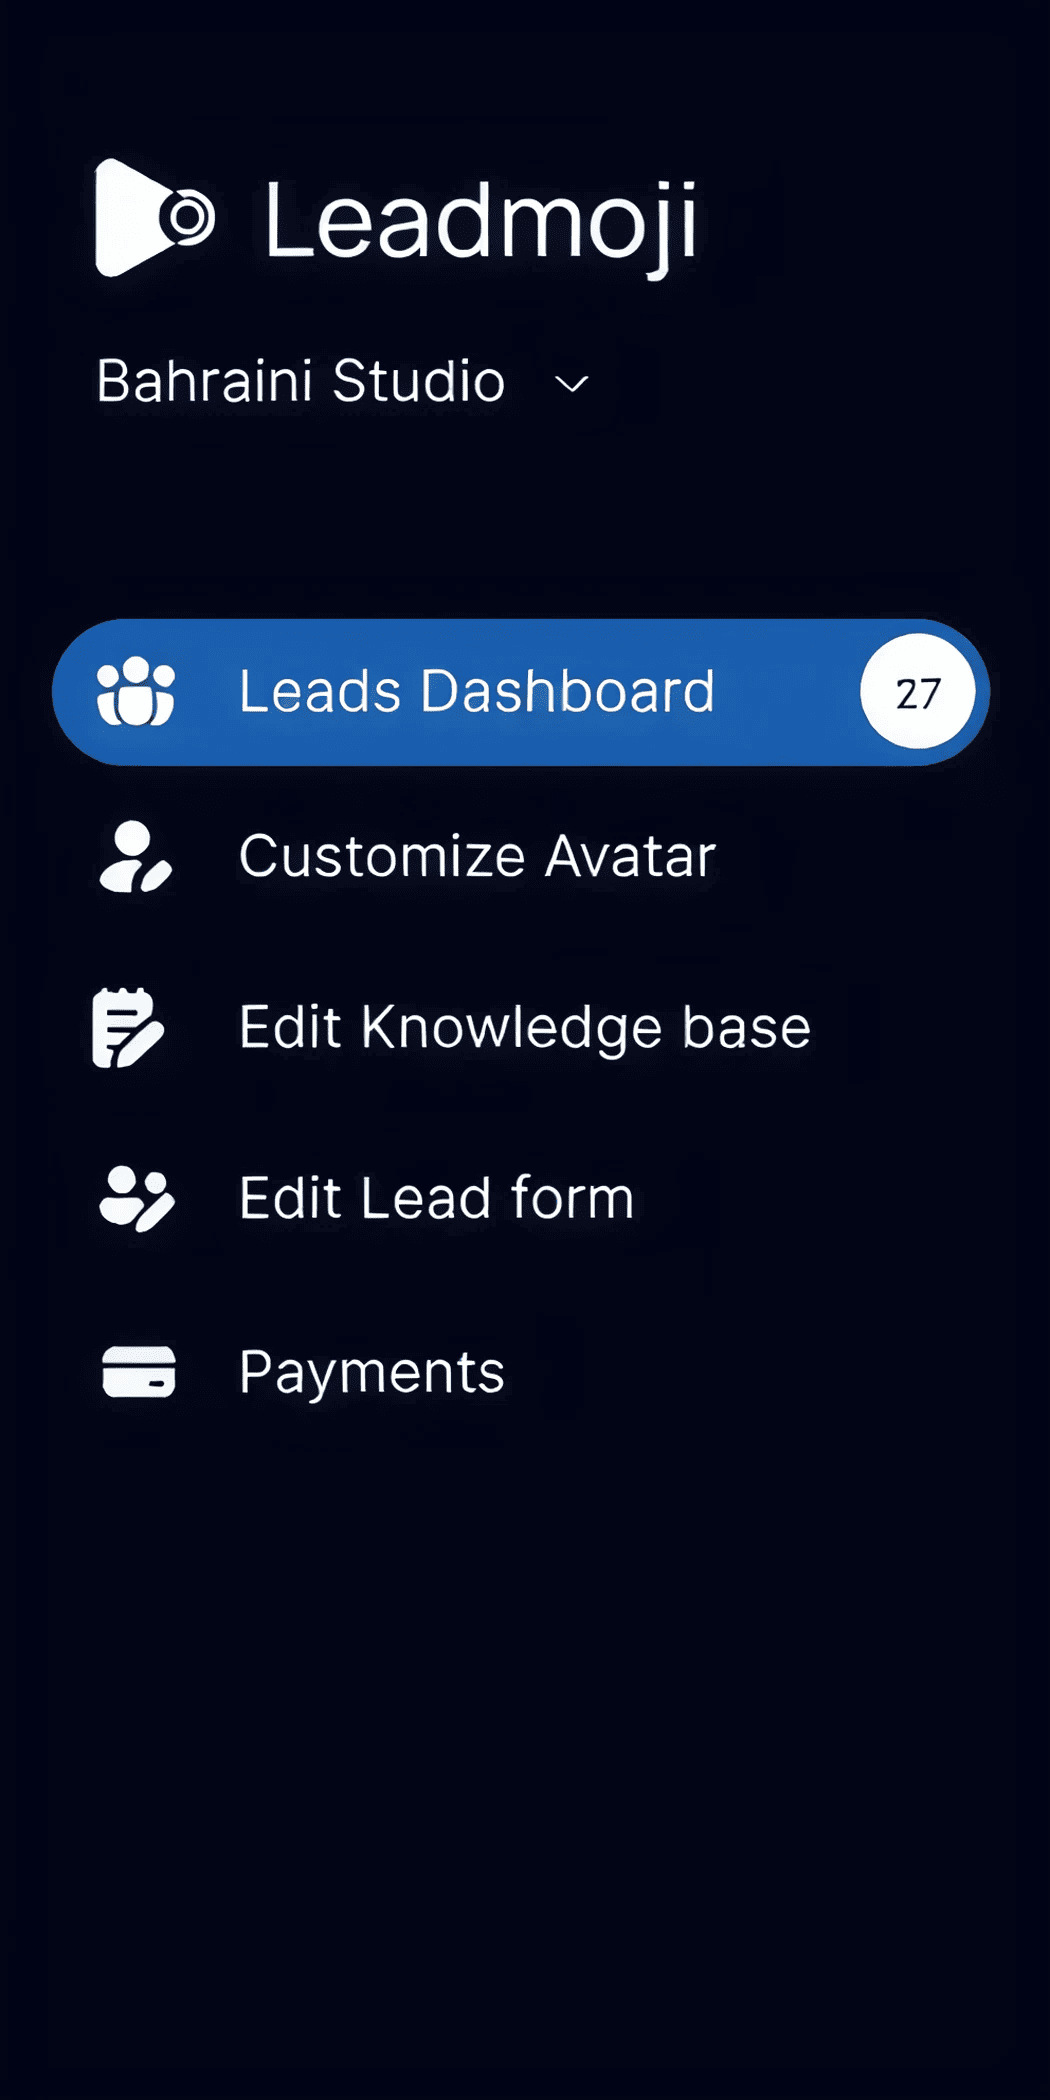
Dashboard Customization Features
You can:
- •Customize Avatar: Change how your assistant looks, talks, and behaves.
- •Edit Knowledge Base: Update what your AI knows and how it answers.
- •Edit Lead Form: Choose what details to collect from visitors.
- •Manage Payments & Settings: Handle account and billing with ease.